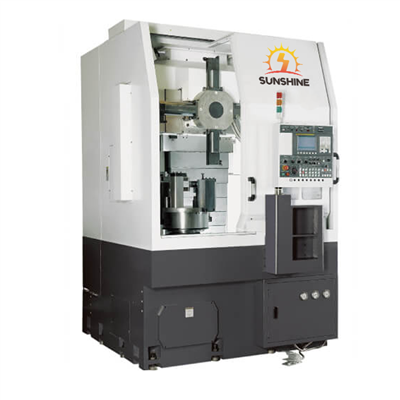
Hey there! As a supplier of CNC vertical lathes, I often get asked about how to install and adjust the tool holder in a CNC vertical lathe. It's a crucial process that can significantly impact the performance and precision of your machining operations. So, let's dive right in and break it down step by step.
Why the Tool Holder Installation and Adjustment Matters
Before we get into the nitty - gritty of the installation and adjustment process, let me quickly explain why it's so important. A properly installed and adjusted tool holder ensures that the cutting tool is held securely and accurately in place. This means better surface finish on your workpieces, higher precision in machining, and longer tool life. On the other hand, a poorly installed or adjusted tool holder can lead to issues like tool vibration, inaccurate cuts, and even damage to the tool and the machine.
Tools You'll Need
First things first, gather the necessary tools for the job. You'll typically need a torque wrench to tighten the bolts to the correct specification, a dial indicator to measure and adjust the tool holder's position accurately, and a set of Allen keys or other appropriate wrenches for removing and installing parts. Make sure these tools are in good condition and calibrated correctly.
Installation Process
Step 1: Prepare the Machine
Before you start installing the tool holder, make sure the CNC vertical lathe is turned off and unplugged for safety. Clean the spindle taper and the tool holder taper thoroughly using a clean, lint - free cloth and a suitable cleaning agent. Any dirt, debris, or chips in the taper can cause misalignment and affect the performance of the tool holder.
Step 2: Inspect the Tool Holder
Take a close look at the tool holder. Check for any signs of damage, such as cracks, chips, or worn - out parts. If you find any issues, don't use the tool holder. Instead, replace it with a new one. A damaged tool holder won't hold the cutting tool properly and can lead to dangerous situations during machining.
Step 3: Insert the Tool Holder
Carefully insert the tool holder into the spindle taper. Make sure it goes in smoothly and all the way. You may need to give it a gentle tap with a soft - faced mallet to ensure a proper fit. Be careful not to hit it too hard, as this could damage the taper.
Step 4: Tighten the Bolts
Once the tool holder is inserted, use the torque wrench to tighten the bolts that secure the tool holder to the spindle. Refer to the machine's manual for the correct torque specification. Over - tightening or under - tightening the bolts can cause problems, so it's crucial to get it right.


Adjustment Process
Step 1: Check the Radial Runout
The radial runout is the amount of deviation of the tool holder from a perfect circular path as it rotates. To check the radial runout, mount a dial indicator on the machine and touch the tip of the indicator to the cutting edge of the tool. Rotate the spindle slowly by hand and observe the reading on the dial indicator. The acceptable radial runout value depends on the specific machining requirements, but generally, it should be as small as possible. If the runout is too large, you'll need to adjust the tool holder.
Step 2: Adjust the Tool Holder
If the radial runout is out of tolerance, you can make adjustments to the tool holder. Some tool holders have adjustable features, such as set screws or shims. Loosen the appropriate set screws or adjust the shims to correct the position of the tool holder. After making the adjustments, re - check the radial runout using the dial indicator. Repeat the adjustment process until the runout is within the acceptable range.
Step 3: Check the Axial Runout
In addition to the radial runout, you also need to check the axial runout, which is the deviation of the tool holder along the axis of rotation. Use the dial indicator to measure the axial runout in a similar way as you did for the radial runout. Adjust the tool holder if the axial runout is not within the acceptable limits.
Tips and Tricks
- Keep a log of the installation and adjustment process, including the torque values, runout measurements, and any adjustments made. This can be helpful for future reference and troubleshooting.
- Regularly inspect and maintain your tool holders. Clean them after each use and store them in a clean, dry place.
- If you're having trouble with the installation or adjustment process, don't hesitate to consult the machine's manual or contact the manufacturer's technical support.
Our CNC Vertical Lathes
At our company, we offer a wide range of high - quality CNC vertical lathes, such as the CNC Vertical Lathe Double Column Lathe CK525. This machine is known for its precision, reliability, and excellent performance. We also have the CNC lathe inclined guide rail, which provides smooth and stable operation. And if you're in the auto parts industry, our CNC Vertical Lathe CK65C For Auto Parts Rims And Rims is a great choice.
Contact Us for Purchase and Negotiation
If you're interested in our CNC vertical lathes or have any questions about tool holder installation and adjustment, we'd love to hear from you. Whether you're a small - scale workshop or a large - scale manufacturing plant, we can provide you with the right solutions to meet your machining needs. Don't hesitate to reach out to us and start a negotiation for your next purchase.
References
- "CNC Machining Handbook"
- Manufacturer's manuals for CNC vertical lathes