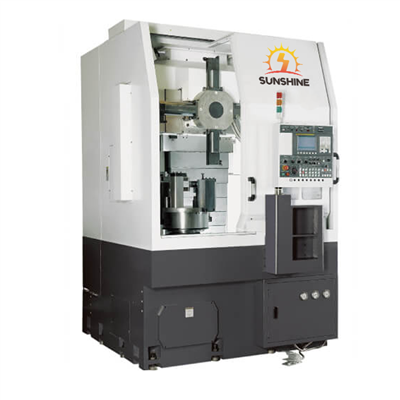
Adjusting the tool height in a high precision CNC lathe is a critical task that directly impacts the quality and accuracy of machining operations. As a leading high precision CNC lathe supplier, we understand the importance of this process and are committed to providing our customers with the necessary knowledge and guidance to ensure optimal performance. In this blog post, we will explore the step-by-step process of adjusting the tool height in a high precision CNC lathe.
Understanding the Importance of Tool Height Adjustment
The correct tool height is crucial for several reasons. Firstly, it ensures that the cutting edge of the tool is precisely aligned with the center of the workpiece. This alignment is essential for achieving accurate dimensions and surface finishes. If the tool is too high or too low, it can result in uneven cutting, excessive tool wear, and poor part quality.
Secondly, proper tool height adjustment helps to prevent tool breakage. When the tool is not properly aligned, it can experience excessive stress during cutting, leading to premature failure. By setting the correct tool height, you can extend the tool life and reduce the frequency of tool changes, thereby improving productivity and reducing costs.
Tools and Equipment Required
Before you start adjusting the tool height, you will need a few essential tools and equipment:
- Dial Indicator: This is used to measure the tool height accurately. A dial indicator provides precise readings and allows you to make small adjustments with ease.
- Tool Setter: A tool setter is a device that helps you set the tool height quickly and accurately. It can be either a manual or an automatic tool setter, depending on your lathe's capabilities.
- Wrenches and Screwdrivers: You will need these tools to loosen and tighten the tool holder and other components on the lathe.
Step-by-Step Guide to Adjusting Tool Height
The following steps outline the process of adjusting the tool height in a high precision CNC lathe:
- Prepare the Lathe: Before you start adjusting the tool height, make sure the lathe is turned off and the power is disconnected. This will prevent any accidents or injuries during the adjustment process.
- Install the Dial Indicator: Mount the dial indicator on the lathe's tool post or a suitable fixture. Make sure the indicator's tip is in contact with the cutting edge of the tool.
- Zero the Dial Indicator: Rotate the dial indicator's bezel until the needle points to zero. This will set the reference point for your measurements.
- Measure the Tool Height: Use the dial indicator to measure the height of the cutting edge of the tool relative to the center of the workpiece. Slowly move the tool post up or down until the dial indicator reads zero. This indicates that the tool is at the correct height.
- Make Adjustments: If the tool height is not correct, you will need to make adjustments. Use the wrenches and screwdrivers to loosen the tool holder and adjust the tool's position. Make small adjustments and recheck the tool height using the dial indicator until it is within the desired tolerance.
- Tighten the Tool Holder: Once the tool height is correct, tighten the tool holder securely using the wrenches and screwdrivers. Make sure the tool is firmly held in place to prevent any movement during machining.
- Verify the Tool Height: After tightening the tool holder, recheck the tool height using the dial indicator to ensure that it has not changed. If necessary, make any final adjustments.
Using a Tool Setter
If your lathe is equipped with a tool setter, the process of adjusting the tool height can be simplified. Here's how to use a tool setter:
- Prepare the Tool Setter: Follow the manufacturer's instructions to set up the tool setter on the lathe. Make sure it is properly calibrated and ready for use.
- Load the Tool: Insert the tool into the tool holder and tighten it securely.
- Position the Tool Setter: Move the tool setter to the position where it can measure the tool height. This may involve moving the tool post or the tool setter itself.
- Measure the Tool Height: Activate the tool setter to measure the tool height. The tool setter will provide a digital readout of the tool height, allowing you to make adjustments quickly and accurately.
- Make Adjustments: If the tool height is not correct, use the tool setter's controls to make adjustments. The tool setter will automatically compensate for any differences in the tool height and position the tool at the correct height.
- Verify the Tool Height: After making adjustments, recheck the tool height using the tool setter to ensure that it is within the desired tolerance.
Factors Affecting Tool Height Adjustment
Several factors can affect the tool height adjustment process. These factors include:
- Tool Wear: As the tool wears, its cutting edge will become dull, which can affect the tool height. It is important to monitor the tool wear regularly and replace the tool when necessary to maintain the correct tool height.
- Workpiece Material: Different workpiece materials have different hardness and cutting characteristics, which can affect the tool height. For example, harder materials may require a higher tool height to ensure proper cutting.
- Cutting Conditions: The cutting conditions, such as the cutting speed, feed rate, and depth of cut, can also affect the tool height. It is important to optimize the cutting conditions to ensure the best possible results.
Tips for Accurate Tool Height Adjustment
Here are some tips to help you achieve accurate tool height adjustment:

- Use a Quality Dial Indicator: Invest in a high-quality dial indicator to ensure accurate measurements. A cheap or low-quality dial indicator may not provide reliable readings, leading to inaccurate tool height adjustment.
- Keep the Tool Holder Clean: Make sure the tool holder is clean and free of debris before you install the tool. Any dirt or debris in the tool holder can affect the tool's position and accuracy.
- Follow the Manufacturer's Instructions: Always follow the manufacturer's instructions when adjusting the tool height. Different lathes may have different procedures and requirements, so it is important to read the manual carefully.
- Practice Regular Maintenance: Regular maintenance of your lathe, including cleaning, lubrication, and calibration, can help to ensure the accuracy and reliability of the tool height adjustment process.
Conclusion
Adjusting the tool height in a high precision CNC lathe is a critical task that requires careful attention to detail. By following the steps outlined in this blog post and using the right tools and equipment, you can achieve accurate tool height adjustment and improve the quality and accuracy of your machining operations.
If you are in the market for a high precision CNC lathe or need further assistance with tool height adjustment, we invite you to explore our range of products, including the Fully automatic CNC inclined lathe, VTC40 CNC Vertical Lathe Made in China, and KD500 Dual-station Vertical Turning and Grinding Machine. Our team of experts is always available to answer your questions and provide you with the support you need to make the right decision for your business.
We encourage you to contact us to discuss your specific requirements and explore how our high precision CNC lathes can help you achieve your machining goals. We look forward to the opportunity to work with you and provide you with the highest quality products and services.
References
- "CNC Programming Handbook" by John A. Zietlow, David A. Warkentin, and Robert A. Rehder
- "Machinery's Handbook" by Erik Oberg, Franklin D. Jones, and Holbrook L. Horton
- Manufacturer's manuals for high precision CNC lathes