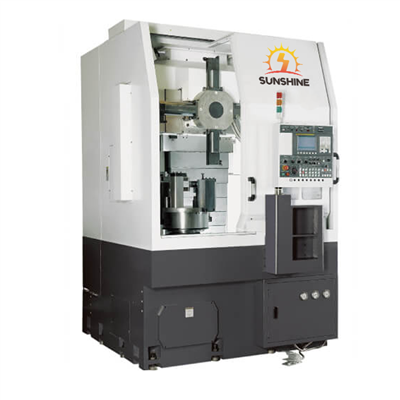
Hey there! As a supplier of High Precision CNC Lathes, I'm super excited to share with you how to program a simple part on one of these bad - boys. It might seem a bit daunting at first, but trust me, once you get the hang of it, it's a piece of cake.
Understanding the Basics of a High Precision CNC Lathe
Before we jump into programming, let's quickly go over what a High Precision CNC Lathe is. It's a machine that uses computer numerical control (CNC) to automate the process of cutting and shaping materials like metal, wood, or plastic. The "high precision" part means it can make really accurate cuts, which is crucial for creating parts that fit together perfectly.
Our company offers a variety of High Precision CNC Lathes, like the Brake Drum CNC Vertical Lathe, the TCK56Y Turning and Milling Compound, and the Small CNC Vertical Lathe For Processing Discs. Each of these machines has its own unique features, but they all follow the same basic principles when it comes to programming.
Getting Started with Programming
1. Know Your Part Design
The first step in programming a part on a CNC lathe is to have a clear design of what you want to make. You can use CAD (Computer - Aided Design) software to create a 2D or 3D model of your part. This model will show you all the dimensions, shapes, and features of the part, which you'll need to translate into a CNC program.
2. Choose the Right Programming Language
Most CNC lathes use a programming language called G - code. G - code is a set of commands that tell the machine what to do, like move the cutting tool, turn on the spindle, or change the feed rate. It's like a secret code for your CNC lathe!
3. Set Up Your Workspace
Before you start writing the program, you need to set up your CNC lathe. This includes mounting the workpiece on the chuck, installing the cutting tool, and setting the zero point. The zero point is the reference point from which all the movements of the cutting tool will be measured.
Writing the G - code Program
1. Start with the Basics
Let's start with a simple example of programming a cylindrical part. First, we need to turn on the spindle. The G - code command for this is "M03 S[speed]". For example, if you want the spindle to rotate at 1000 RPM, you'd write "M03 S1000".
Next, we need to move the cutting tool to the starting position. We use the G00 command for rapid positioning. For example, if you want to move the tool to the X = 20 and Z = 5 position, you'd write "G00 X20 Z5".
2. Cutting Operations
To cut the material, we use the G01 command for linear interpolation. Let's say we want to cut a straight line from the starting point (X = 20, Z = 5) to (X = 10, Z = 0). We'd write "G01 X10 Z0 F[feed rate]". The "F" parameter sets the feed rate, which is how fast the cutting tool moves through the material. For example, "F0.1" means a feed rate of 0.1 mm per revolution.
3. Finishing the Program
Once you've completed all the cutting operations, you need to turn off the spindle and move the cutting tool back to a safe position. The command to turn off the spindle is "M05", and you can use "G00" to move the tool back. Finally, you add the "M30" command to end the program.
Here's a simple G - code program for our cylindrical part:
O1000 ; Program number
M03 S1000 ; Turn on the spindle at 1000 RPM
G00 X20 Z5 ; Rapid positioning to starting point
G01 X10 Z0 F0.1 ; Cut a straight line
M05 ; Turn off the spindle
G00 X50 Z50 ; Move the tool to a safe position
M30 ; End the program
Loading and Running the Program
1. Loading the Program
Once you've written the G - code program, you need to load it into the CNC lathe's control system. You can do this using a USB drive, an Ethernet connection, or a serial port.
2. Dry Run
Before you start cutting the actual material, it's a good idea to do a dry run. This means running the program without the cutting tool actually touching the material. It allows you to check for any errors in the program and make sure the machine moves as expected.
3. Running the Program
If the dry run goes well, you're ready to start cutting! Press the cycle start button on the CNC lathe's control panel, and watch as the machine brings your part to life.


Troubleshooting
Even the most experienced programmers run into problems sometimes. Here are some common issues and how to fix them:
1. Tool Collision
If the cutting tool collides with the workpiece or the chuck, it could be due to an error in the program or incorrect setup. Check the G - code for any incorrect coordinates or commands, and make sure the zero point is set correctly.
2. Poor Surface Finish
If the surface of the part looks rough, it could be because of a wrong feed rate, spindle speed, or cutting tool. Try adjusting these parameters to improve the surface finish.
3. Program Errors
If the CNC lathe gives you an error message, read the error code carefully. It usually indicates what's wrong with the program, like a missing command or incorrect syntax.
Conclusion
Programming a simple part on a High Precision CNC Lathe isn't as hard as it seems. By following these steps, you can create your own G - code programs and start making amazing parts. Remember, practice makes perfect!
If you're interested in purchasing a High Precision CNC Lathe for your business, we're here to help. Whether you need a Brake Drum CNC Vertical Lathe, a TCK56Y Turning and Milling Compound, or a Small CNC Vertical Lathe For Processing Discs, we've got the right machine for you. Reach out to us to start a purchase negotiation, and let's take your manufacturing to the next level!
References
- "CNC Programming Handbook" by Dan Holtz
- "G - code Programming for CNC Machines" by John Doe