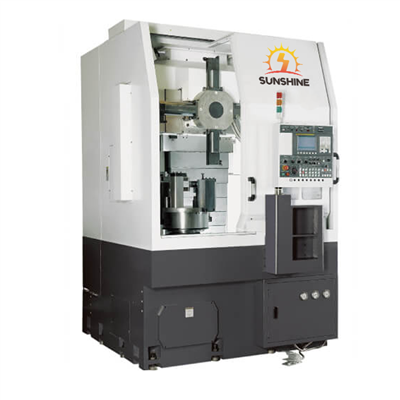
Hey there! As a supplier of CNC drilling lathes, I'm super stoked to walk you through the process of installing the electrical system of a CNC drilling lathe. It might seem a bit daunting at first, but with the right know - how, you'll have it up and running in no time.
Pre - installation Preparations
Before we jump into the actual installation, it's crucial to do some prep work. First off, you need to have a clear understanding of the electrical requirements of your CNC drilling lathe. Check the machine's manual to see what voltage, frequency, and amperage it needs. Make sure your power supply can meet these specifications. If not, you might need to upgrade your electrical system at the facility.
Also, gather all the necessary tools. You'll need things like screwdrivers (both flat - head and Phillips), wire strippers, crimping tools, and a multimeter. The multimeter is especially important as it helps you test the electrical connections and ensure everything is working as it should.
Unpacking and Inspecting the Electrical Components
Once you've got your prep work done, it's time to unpack the electrical components that come with your CNC drilling lathe. Carefully remove them from their packaging and inspect them for any visible damage. Look for things like bent pins, cracked casings, or loose wires. If you find any damaged components, contact us right away. We'll replace them for you to ensure the proper functioning of your machine.
Mounting the Electrical Control Panel
The electrical control panel is the brain of your CNC drilling lathe. It houses all the important electrical components like the PLC (Programmable Logic Controller), relays, and contactors. Find a suitable location on the machine to mount the control panel. Usually, it's placed in a spot that's easily accessible for maintenance but also protected from dust and debris.
Use the appropriate screws and brackets to secure the control panel firmly in place. Make sure it's level and doesn't wobble. A wobbly control panel can cause loose connections over time, which can lead to electrical problems.
Wiring the Electrical System
Now, let's get into the wiring part. This is where things can get a bit tricky, but if you follow the wiring diagram provided in the machine's manual, you'll be fine. Start by connecting the power supply wires to the main circuit breaker in the control panel. Use wire nuts or crimp connectors to ensure a secure connection.
Next, connect the wires for the motor. The motor is a key component of the CNC drilling lathe, so make sure the connections are correct. Different motors might have different wiring configurations, so double - check the manual.
After that, wire up the sensors and switches. These are used to control various functions of the machine, like the spindle speed, feed rate, and tool position. Connect them to the appropriate terminals in the control panel. Be careful not to cross - wire anything, as this can cause the machine to malfunction.
Grounding the Electrical System
Grounding is a crucial step in the installation process. It helps protect the machine and the operators from electrical shocks. Connect a grounding wire from the control panel to a proper grounding point. This can be a grounding rod driven into the ground or a grounding bus bar in your electrical system.
Make sure the grounding connection is tight and secure. You can use a multimeter to test the grounding resistance. The resistance should be within the acceptable range specified in the manual.


Testing the Electrical System
Once you've completed the wiring and grounding, it's time to test the electrical system. Before you turn on the power, do a final visual inspection to make sure all the connections are correct and there are no loose wires.
Turn on the main power switch and use the multimeter to check the voltage at various points in the system. Make sure the voltage is within the specified range. Then, start the machine and test its basic functions, like the spindle rotation and the movement of the axes.
If you encounter any problems during the testing phase, don't panic. Check the wiring connections again and refer to the troubleshooting section in the manual. If you still can't figure it out, give us a call. Our technical support team is always ready to help.
Maintenance and Safety Tips
After the installation is complete and the machine is running smoothly, it's important to perform regular maintenance on the electrical system. Check the connections periodically for tightness and look for any signs of wear or damage. Clean the control panel and the electrical components to prevent dust and debris from building up.
Also, always follow safety procedures when working with the electrical system. Wear appropriate personal protective equipment, like insulated gloves and safety glasses. Make sure the power is turned off before you perform any maintenance or repairs.
Conclusion
Installing the electrical system of a CNC drilling lathe might seem like a complex task, but if you follow the steps outlined above, you'll be able to do it successfully. At our company, we're committed to providing high - quality CNC drilling lathes and excellent customer support. If you have any questions or need further assistance, don't hesitate to reach out to us.
We have a wide range of CNC lathes available, such as the Vtc80a CNC Vertical Lathe For Valve Processing, the CK65C Vertical Cnc Lathe, and the CNC Vertical Lathe VTV80a For Valve Processing. If you're interested in purchasing a CNC drilling lathe or need more information about our products, feel free to contact us for a detailed discussion and negotiation. We're looking forward to working with you!
References
- CNC Drilling Lathe User Manual
- Electrical Installation Standards and Guidelines